Nexus Uploader OnDemand Application
To launch an instance of the Nexus Uploader click the Interactive Apps Selection, then the MyEMSL(Nexus Data Portal) Uploader option.
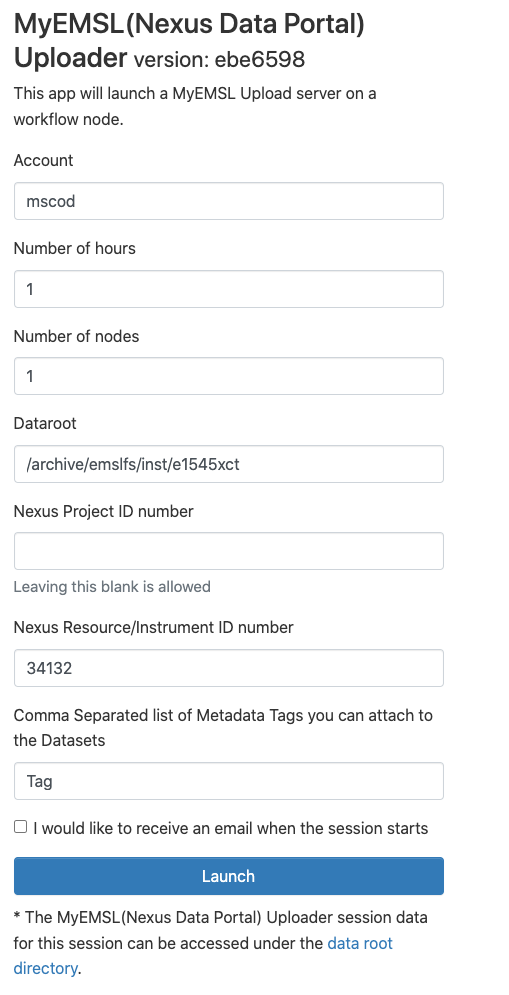
- Fill In the Options as follows:
Account - Slurm account to charge time to.
Number of Hours - how many hours you will need to upload your data to nexus. If you have large datasets, you may need hours to make sure it has time to upload all the data.
Number of Nodes - set this to 1
Dataroot - the filepath on tahoma where the data you will be uploading lives, ‘/home’,’/tahoma’,’/emslfs’, and ‘/archive’ paths are available.
Nexus Project ID number - the ID of the nexus project you are uploading data for. This can be left blank.
Nexus Resource or Instrument ID - Must be filled in
Metadata Tags - put in a comma separated list of metadata tags you will attach to each upload you perform with the uploader.
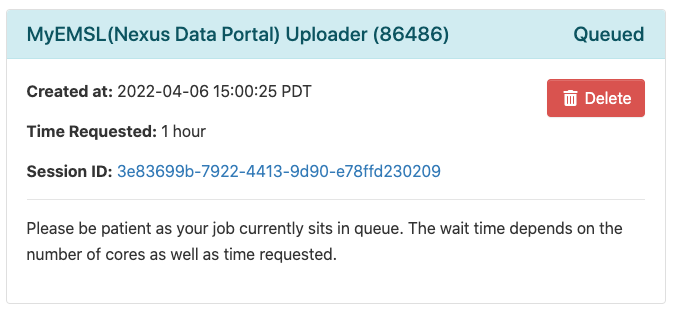
Then press the Launch button. You should see a Session Status panel like this:
When the Nexus Uploader has started you will see the Status panel change to this:
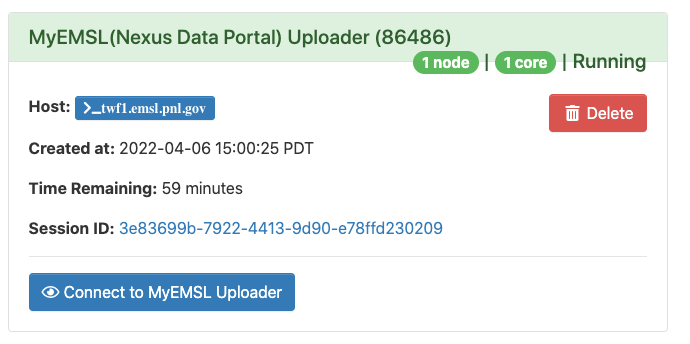
Clicking the Connect To MyEMSL Uploader will open a new window with the Nexus Uploader Interface:
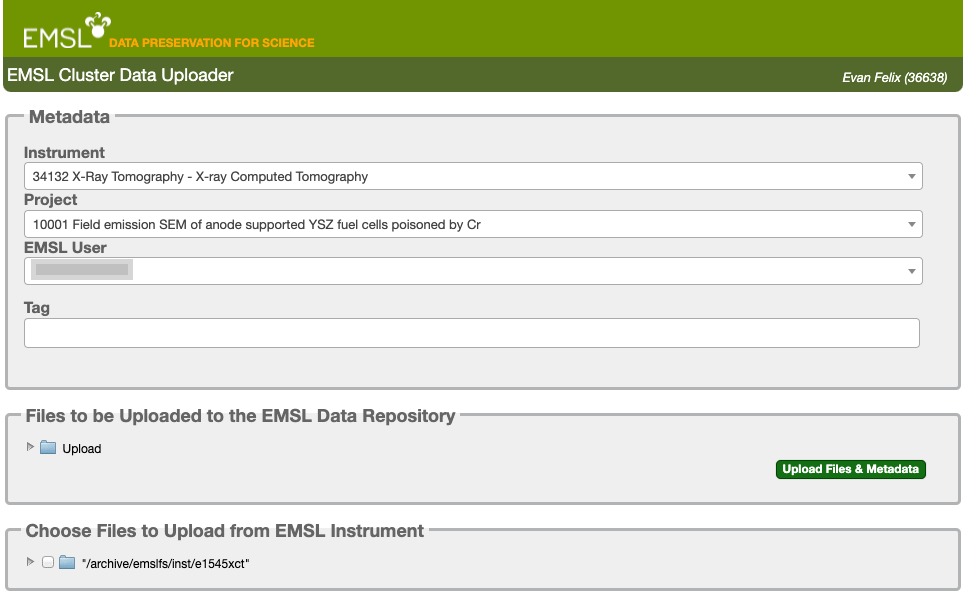
When you are done with the Uploader interface and the uploads have finished, return to the Status panel and click the delete button.